
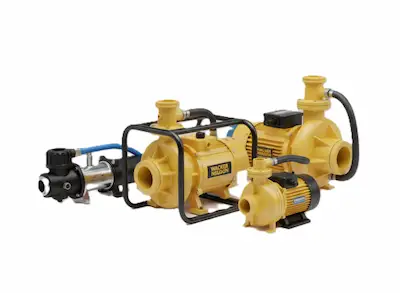
Ordering diaphragm pump parts goes wrong in the same place almost every time. Someone describes the pump instead of reading it, and the box that arrives fits a pump one size up.
Two minutes with the data plate prevents the return shipping and the second week of downtime.
Identifying What You Need
Start at the data plate on the frame, which carries the manufacturer, model and usually a serial number. Where the plate is gone, measure the suction port and count the diaphragms, then match that against the manufacturer’s range rather than guessing from the pump’s appearance.
Key Takeaways
- Read the data plate, never describe the pump from memory.
- Port size and diaphragm count narrow it down when the plate is gone.
- Kits are cheaper than the same parts bought separately.
- Match diaphragm material to the liquid, not to the price.
- Torque the cover evenly or the new diaphragm tears.
Sizing by Port and Duty
| Pump size | Typical work |
|---|---|
| 2 inch | Utility work, rental fleets, light construction |
| 3 inch | Construction dewatering, slurry, concrete work |
| 4 inch | High volume, heavy duty applications |
Port size is the fastest way to narrow a search, and it is also the one measurement people get wrong by eyeballing it. Measure the inside diameter of the suction port rather than the hose that happens to be fitted, since a previous owner may have adapted it.
The Parts That Actually Wear
A diaphragm pump has a short list of consumables, and almost every repair is one of them. The diaphragm itself flexes on every stroke and is the item with a defined service life.
Valves and seats come next, followed by the gaskets that seal the covers. The anatomy of each is set out in our visual walkthrough of diaphragm pump parts, and the operating principle behind them is covered in this reference on the diaphragm pump.
Kits Versus Individual Parts
- Full service due: buy the kit, it bundles what wears together.
- One early failure: buy the single part.
- Unknown history: assume a full service is due.
- Rental fleet: stock kits, since downtime costs more than parts.
- Mixed brands on site: keep the model numbers on file.
The economics usually favor the kit. Valves and gaskets that have run alongside a worn diaphragm are rarely far behind it, and opening the same pump twice in a season costs more in labor than the extra components ever cost to buy.
Choosing the Material
Material selection is where a cheap order becomes an expensive one. Natural rubber handles dewatering and clean water, neoprene stands up to abrasion in slurry, and nitrile is the choice where fuel or petroleum has contaminated the water.
Getting this wrong does not fail immediately, which is what makes it deceptive. The diaphragm swells or hardens over weeks and then splits, and the pump is stripped again for a part that should have lasted a season. Whether genuine or aftermarket parts are the better value is covered in our comparison of genuine and generic parts.
Fitting Without Ruining the New Part
Clean the sealing faces completely before the cover goes back, because old gasket material stops the new one seating and creates a leak that looks like a failed diaphragm.
Then tighten the cover bolts in a cross pattern and to an even torque. Pulling one side down first stretches the diaphragm across the housing and tears it, sometimes within the first hour of running. The wider replacement procedure is in our mud hog diaphragm replacement guide, and what these pumps are built to survive is in our trash pump guide.
Frequently Asked Questions
What are the spare parts available for a diaphragm pump?
The spare parts available for a diaphragm pump are the diaphragms themselves, valve balls and seats, O-rings and gaskets, and complete wet-end repair kits that bundle those together. Most repairs use one of that short list, which is why kits often work out cheaper than ordering the same items individually.
How do you identify which diaphragm pump you have?
Identifying a diaphragm pump starts with the data plate on the frame, which carries the manufacturer, model and often a serial number. Where that plate is missing or painted over, measure the suction port and count the diaphragms, then match against the manufacturer’s range. Photograph the plate before it corrodes any further.
How do I rebuild a diaphragm pump?
Rebuilding a diaphragm pump means stripping the wet end, replacing the diaphragms, valve balls, seats and gaskets, then reassembling with the cover bolts torqued evenly in a cross pattern. Clean every sealing face completely before it goes back together, because leftover gasket material stops the new one seating and creates a leak that looks like a failed diaphragm.
Which diaphragm material should you choose?
Choose the diaphragm material by what the pump handles rather than by price. Natural rubber suits dewatering and clean water, neoprene resists abrasion in slurry, and nitrile is the one for fuel or petroleum contaminated water. Fitting the cheapest material into the wrong liquid is a fast route back to the same repair.
What happens if the diaphragm is broken?
If the diaphragm is broken the pump stops moving liquid, because there is no longer a sealed chamber to displace it. On many pumps the pumped liquid then reaches the drive side, which turns a cheap part into a larger repair. Stop the pump rather than running it on in the hope it clears.
Diaphragm Pump Parts at Ken’s Distributing
Ken’s Distributing stocks diaphragms, valves, seats and full repair kits across the CH&E and Magnum range and the wider water pump range.
Send us a photograph of the data plate and a note on what the pump handles, and we will match both the size and the material rather than shipping whatever fits the port.